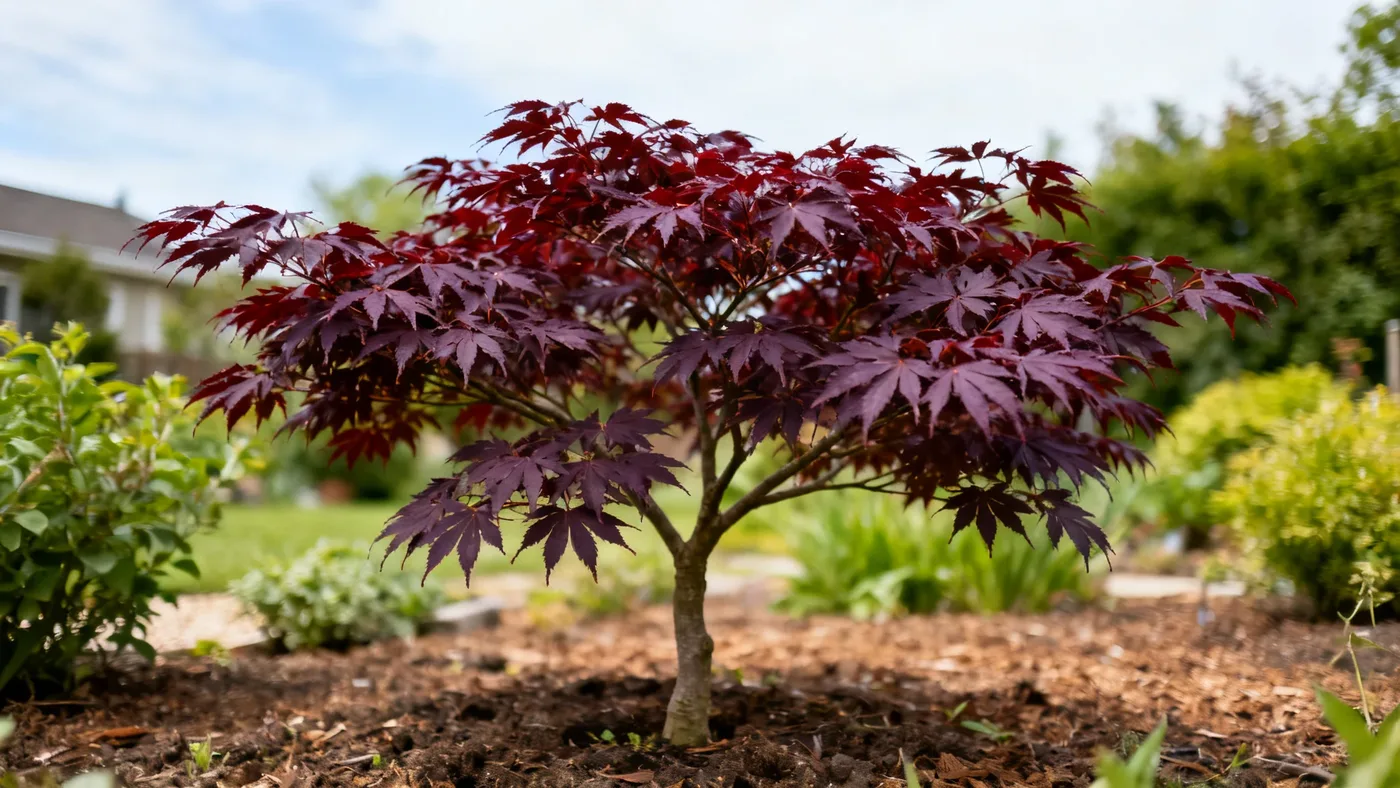
Best Soil for Bloodgood Japanese Maple: pH and Drainage Tips
The difference between a thriving Bloodgood Japanese Maple and a struggling one often comes down to one thing: the soil it's growing in. This cultivar is notoriously sensitive to poorly drained or compacted soil, and even small imbalances in pH can show up as leaf scorch, weak growth, or root problems that take years to manifest. If you're planning to plant one or care for an existing tree, understanding the best soil for Bloodgood Japanese Maple is essential.
Why Soil Matters for Bloodgood Japanese Maple
Bloodgood Japanese Maple thrives in well-drained, rich loam. The word "rich" is key: this cultivar isn't indifferent to soil quality the way some ornamental trees are. It has fine, shallow roots that need consistent moisture but will rot quickly if water pools around them. At the same time, it's not a tough, drought-tolerant plant. This combination means the soil must strike a precise balance: moisture-retentive enough to feed the tree through dry spells, yet draining fast enough that roots don't suffocate.
Poor drainage is the single biggest killer of these trees. In clay-heavy soils or compacted sites, roots often develop a girdling pattern as they search for air pockets, eventually cutting off water and nutrient flow to the canopy. By the time you see symptoms (yellowing leaves, branch die-back), the damage is often irreversible. The good news: you can prevent this entirely by understanding what your soil needs before planting.
Understanding pH Requirements for Bloodgood Japanese Maple
Bloodgood Japanese Maple performs best in slightly acidic to neutral soil, roughly pH 5.5 to 6.5. This narrow range isn't a suggestion, it's where the tree's root system absorbs nutrients most efficiently. Outside this range, micronutrients like iron and manganese become locked up, and the tree can't access them even if they're present in the soil.
The easiest way to know your starting point is a soil test. Most local extension services offer inexpensive testing (often $15 to $30) that will tell you your current pH and whether your soil is acidic or alkaline. If your soil reads below 5.5, it's too acidic for most cultivars; above 6.5, it's trending alkaline. For Bloodgood Japanese Maple soil pH adjustment:
- If your soil is too acidic (below 5.5): Add finely ground dolomitic limestone, following the extension service's recommendation for application rate. Limestone takes 2 to 4 weeks to shift pH noticeably.
- If your soil is too alkaline (above 6.5): Add sulfur or aluminum sulfate (alum). Sulfur is slower but gentler; aluminum sulfate works faster but requires careful handling. Follow your extension service's rate.
- If your soil is already in the 5.5 to 6.5 range: You're in the sweet spot. Focus on drainage and organic matter instead.
Avoid guessing. A cheap pH meter from a garden center is unreliable, and over-amending is as bad as under-amending. The small cost of a professional soil test pays for itself by preventing years of poor growth.
Japanese Maple Soil Drainage and Moisture Management
Japanese maple soil drainage is not negotiable. Bloodgood is sensitive to compacted soil and absolutely demands good drainage. In heavy clay, even a 4-inch pot planted at grade will accumulate standing water if the surrounding soil doesn't slope slightly away from the tree's base.
How do you test drainage before planting? Dig a hole 12 inches deep and 12 inches wide in your planting location. Fill it with water and let it drain completely. Then fill it again and time how long the water takes to drain fully. Ideally, water should drain at 1 to 2 inches per hour. If it's draining slower than 1 inch per hour, your site has poor drainage and needs amendment.
Good drainage doesn't mean dry. Bloodgood Japanese Maple likes consistent moisture during the growing season. The distinction is this: the soil dries out gradually after watering but doesn't stay waterlogged. Mulch helps achieve this balance. A 2-to-3-inch layer of aged hardwood mulch (not fresh bark) regulates moisture and keeps the soil cooler in hot climates, where afternoon shade is already recommended to prevent leaf scorch.
Soil Texture and Structure: Building Your Mix
The best soil for Bloodgood Japanese Maple is loam: a balanced blend of sand, silt, and clay that holds moisture without becoming compacted. If your native soil is mostly clay or sand, amending soil for Japanese maple means adjusting the texture.
Start with a soil test or simple jar test. Fill a clear jar halfway with soil from your planting area, add water to fill it, then stir vigorously and let it settle for 24 hours. Sand sinks first (bottom layer), then silt (middle), then clay (top, often cloudy). If clay dominates, you'll need serious amendment. If it's already balanced, light amendment is enough.
For heavy clay (the most common problem), the ideal amendment is compost. Compost is already partially broken down, so it improves drainage immediately without introducing fresh organic matter that might encourage fungal problems. Apply 2 to 3 inches of compost across the planting area and work it in to a depth of 8 to 10 inches. This is more effective than simply digging a fancy planting hole in bad soil.
For sandy soil (rare but problematic), compost or aged manure adds water retention and nutrients. Sandy soil drains too fast and can't support consistent moisture.
Step-by-Step Guide to Preparing Your Planting Hole
Materials you'll need:
- Soil testing kit or extension service soil test
- Shovel and digging fork
- Aged compost or composted bark (3 to 5 cubic feet for an average planting hole)
- Mulch (aged hardwood or pine bark)
- Tape measure
- Slow-release fertilizer (optional, balanced NPK like 10-10-10)
- Water source and hose
Steps:
- Test your soil drainage first. Dig a test hole 12 inches deep and 12 inches wide at your planting site. Fill with water and time the drainage (see section above). If water lingers after 2 hours, plan on amending the entire planting area, not just the planting hole.
- Get a soil pH test. Collect soil from three spots around your planting area, mix them together, and send a sample to your local extension office. Results typically arrive within 1 to 2 weeks and will recommend specific amendment rates for your target pH. Don't skip this step.
- Amend the planting area broadly. Don't dig a perfect planting hole and then plant a tree in clay. Instead, prepare a 3-to-4-foot-diameter circle around your planting location. Spread 2 to 3 inches of compost across this area and work it into the top 8 to 10 inches of existing soil using a digging fork. This creates a transition zone that encourages roots to spread outward rather than staying confined to a planting hole.
- Adjust pH if needed. If your extension test recommended limestone or sulfur, apply it according to their rate and work it into the amended soil. Let it settle for 2 to 4 weeks before planting if possible; if you're planting immediately, water thoroughly to help incorporation.
- Dig the planting hole. Make the hole only slightly wider than the root ball (no more than 1 to 2 inches on each side) and just deep enough so the top of the root ball is at or slightly above grade. Bloodgood Japanese Maple planted too deep often develops girdling roots. The top of the root ball should be visible or level with the soil surface.
- Backfill with the amended soil. Use the soil you've just amended (clay or sand amended with compost) to fill the hole. Don't bring in entirely new topsoil or bagged "planting soil"; it creates a boundary that restricts root growth and can trap water.
- Water deeply. Water the entire amended area, not just the planting hole. This settles the soil and confirms good water penetration. If water pools on the surface, your drainage is still poor and needs more amendment.
- Mulch and stake if needed. Apply 2 to 3 inches of aged hardwood mulch around the base, keeping it a few inches away from the trunk (no volcano mulch). If the tree is taller than 6 feet, stake it loosely for the first 1 to 2 growing seasons.
Amending Soil for Japanese Maple in Existing Gardens
If your Bloodgood Japanese Maple is already planted but struggling, amending soil after planting is still possible. The approach is gentler but takes longer.
- Apply compost as a top-dressing. Add 1 to 2 inches of aged compost around the base each fall. Over 3 to 5 years, this gradually improves the soil structure and increases organic matter, which helps both drainage and water retention.
- Adjust pH on established trees carefully. If a soil test shows the pH is far outside the ideal 5.5 to 6.5 range, adjust it slowly. Limestone or sulfur can be applied to the soil surface and watered in, but expect gradual change (2 to 3 pH points per year). Avoid sudden, heavy applications, which can shock an established root system.
- Improve drainage at the surface. If water pools around the tree after rain, build up the soil slightly around it (a gentle slope, not a raised mound) or dig shallow drainage channels to direct water away. This doesn't fix poor drainage deep in the soil but can prevent water from sitting on the surface.
- Don't cultivate or disturb roots. Bloodgood Japanese Maple's shallow root system is easily damaged. Avoid tilling, deep digging, or removing soil within the drip line of the tree.
Common Mistakes to Avoid
- Planting too deep. The top of the root ball should be at grade or slightly above, never buried. Deep planting leads to girdling roots and slow decline.
- Amending only the planting hole. A perfect 3-foot planting hole surrounded by clay is useless. Amend a 3-to-4-foot-diameter area so roots want to spread outward, not circle the planting hole.
- Ignoring drainage entirely. Assuming your site drains fine without testing. A drainage test takes 30 minutes and prevents years of problems.
- Guessing on pH. Adjusting pH without a soil test often makes things worse. A $20 test is worth the certainty.
- Using fresh wood chips or bark. Fresh material ties up nitrogen as it decomposes. Aged compost or aged hardwood mulch are better choices.
- Volcano mulching. Piling mulch directly against the trunk traps moisture and can lead to rot or girdling roots. Keep mulch 2 to 3 inches away from the base.
- Over-fertilizing after planting. High nitrogen pushes weak, leggy growth and can scorch foliage. A light feeding with a balanced, slow-release fertilizer in early spring is enough; many trees need no fertilizer at all if the soil is rich loam.
Expected Results
A Bloodgood Japanese Maple planted in well-draining, pH-balanced soil should establish itself within the first 1 to 2 growing seasons. You may notice deeper, more stable foliage color, healthier new growth in spring, and fewer signs of stress (like leaf scorch or yellowing) during dry spells or heat waves. The tree grows at a slow to moderate rate, roughly 12 to 18 inches per year, and will reach a landscape-usable size of 6 to 8 feet in about 5 to 7 years. Proper soil from the start is one of the most powerful ways to support this growth trajectory and help your tree live a long, healthy life. See our guide on complete Bloodgood Japanese Maple care for seasonal maintenance, and learn more about mature size expectations to plan your landscape.
Quick Reference: Bloodgood Japanese Maple Soil Checklist
| Soil Requirement | Ideal Target | What to Check |
|---|---|---|
| pH level | 5.5 to 6.5 (slightly acidic to neutral) | Get a soil test from your extension service |
| Drainage rate | 1 to 2 inches per hour | Dig a 12-inch hole, fill with water, time the drain |
| Soil texture | Rich loam (balanced sand/silt/clay) | Jar test or extension soil test |
| Organic matter | 2 to 3 inches of aged compost mixed in | Amend before planting; top-dress annually after |
| Moisture consistency | Moist but not waterlogged | Soil dries gradually after rain, doesn't pool |
| Mulch layer | 2 to 3 inches aged hardwood or pine bark | Keep mulch 2 to 3 inches away from trunk |
| Planting depth | Root ball at or slightly above grade | Never bury the top of the root ball |