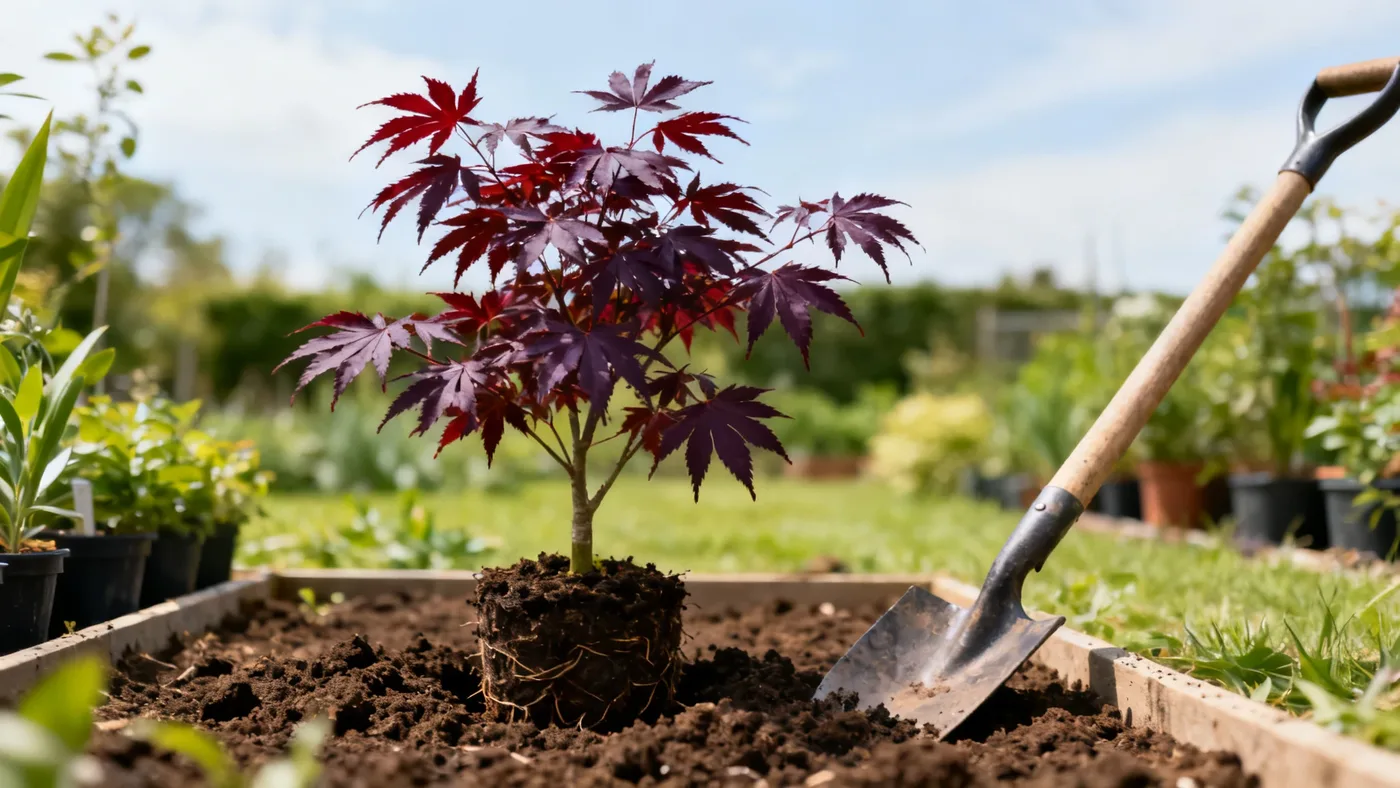
How to Plant a Bloodgood Japanese Maple the Right Way
Planting a Bloodgood Japanese Maple is one of the most rewarding ways to add year-round color and architectural interest to your landscape. This burgundy-leafed cultivar holds its deep reddish-purple color better than many red Japanese maples, and when planted in the right location with proper technique, it becomes a focal point that works in gardens, patios, and Japanese-style landscapes. But planting bloodgood japanese maple successfully requires attention to timing, site selection, and soil preparation. Skip these steps and you risk leaf scorch, root problems, or stunted growth. Follow this guide and your new tree will establish quickly and thrive for decades.
Timing: When to Plant Bloodgood Japanese Maple
The best time to plant bloodgood japanese maple is early spring or fall, when the tree is dormant or just emerging from dormancy. In spring, plant as soon as soil is workable (March through early May, depending on your zone). In fall, plant from late September through October, giving the roots 4 to 6 weeks to establish before hard frost. Avoid planting during summer heat or late spring when new growth is tender and frost-sensitive. If temperatures exceed 85°F at planting time, wait until fall or wait for a cool spell in late spring. The cooler soil and air reduce transplant shock and give roots time to settle in.
Check your USDA hardiness zone to confirm Bloodgood is suitable for your area. This cultivar thrives in zones 5 through 8. Some sources extend hardiness to zone 9 with afternoon shade in the hottest regions, but zone 9 gardeners should plan afternoon shade and consistent watering. If you live in zone 4 or colder, this maple is not reliably hardy for you.
Choosing the Right Location
Where to plant bloodgood japanese maple matters as much as when. Bloodgood performs best in full sun to part shade. In cooler climates (zones 5-6), full sun produces the best burgundy color. In hotter zones (7-8), afternoon shade is recommended to prevent leaf scorch. Afternoon scorch shows as brown, papery leaf margins and fading red color to green, especially during heat waves or dry spells.
Choose a spot with good air circulation but protected from strong winds. Harsh winds, especially hot dry winds in summer, stress the tree and cause scorch. Avoid low-lying areas where cold air settles or where water pools. Bloodgood is sensitive to poorly drained soil and root rot, so good drainage is essential.
Plan spacing carefully if you're planting near structures or other trees. At maturity, Bloodgood reaches 15 to 20 feet tall and 15 to 20 feet wide. Space your tree 12 to 20 feet from buildings, fences, and other trees depending on the mature width you expect. This prevents overcrowding as the tree grows and avoids damage to foundations or blocked light for nearby plants.
Soil Preparation and Testing
Bloodgood japanese maple planting instructions always emphasize soil quality because this cultivar is sensitive to poor growing conditions. The tree thrives in well-drained, rich loam with slightly acidic to neutral pH (5.5 to 6.5). Before planting, take a soil sample and have it tested by your local extension service if you're unsure of your soil's pH and drainage. This small step prevents months of struggle later.
If your soil is heavy clay or compacted, amend it generously. Mix the native soil with compost or aged bark at a ratio of 1 part amendment to 2 parts native soil, working this mix to a depth of 12 to 18 inches in your planting area. If your soil is sandy and drains too quickly, add compost to increase water retention. Rich, well-draining soil is the single biggest factor in Bloodgood success.
Check soil drainage before planting. Dig a hole about 12 inches deep in your planting spot, fill it with water, and let it drain overnight. If water still pools the next day, your drainage is poor. Either amend the soil heavily or choose a different site. Root rot from waterlogging is difficult to treat and often fatal.
What You'll Need Before You Start
Gather these materials before digging:
- A healthy Bloodgood Japanese Maple sapling (typically sold in quart, #1, or #3 containers by nurseries)
- Compost or aged bark for soil amendment
- Garden spade or sharp shovel
- Measuring tape
- Garden gloves
- Landscape fabric or mulch (organic bark mulch, 3 to 4 inches deep)
- Watering can or garden hose with gentle spray nozzle
- Slow-release, balanced fertilizer formulated for woody ornamentals (optional, for spring planting)
- Soil test kit or results from your extension service
Step-by-Step Planting Instructions
Step 1: Prepare the Planting Hole
Dig a hole as deep as the root ball and 2 to 3 times wider. If you're planting a #1 container tree (roughly 1 gallon), the hole should be about 12 inches deep and 24 to 36 inches wide. For a #3 container (3 gallons), dig 18 inches deep and 36 to 48 inches wide. A wide, shallow hole is better than a deep, narrow one. Too-deep planting causes girdling roots and suffocation at the soil line, leading to slow decline.
Step 2: Amend the Backfill Soil
Mix the soil you removed from the hole with compost at a 2:1 ratio (two parts native soil to one part compost). This creates the ideal growing medium for Bloodgood. Reserve about one-third of this amended soil for backfill after the tree is positioned.
Step 3: Position the Maple
Carefully remove the tree from its container by tilting it sideways and gently sliding it out. Avoid yanking on the stem. If the tree is pot-bound (roots circling tightly), gently tease apart the root ball with your fingers or a small knife to encourage outward growth. Set the tree in the hole so the top of the root ball is level with or slightly above the surrounding soil. If you plant too deep, girdling roots will form and strangle the tree as it grows.
Step 4: Backfill the Hole
Add the amended soil around the root ball in layers, gently firming as you go. Do not stomp or pack hard. You want the soil in firm contact with roots but still loose enough for water and air to penetrate. Fill to the top of the root ball, creating a slight berm (raised ring of soil) around the planting hole to hold water. The berm should be 2 to 3 inches tall and extend out about 18 inches from the tree stem.
Step 5: Water Thoroughly
Water deeply and slowly right after planting, letting water soak in for several minutes. This settles the soil, eliminates air pockets, and hydrates the root system. Apply enough water that it pools slightly and soaks into the root ball. For a young tree, this typically takes 5 to 10 minutes of gentle watering.
Step 6: Apply Mulch
Spread 3 to 4 inches of organic mulch (shredded bark or composted wood) around the base, keeping it 4 to 6 inches away from the tree stem. Do not mound mulch against the trunk. Mulch keeps soil cool, retains moisture, and suppresses weeds, which compete with the young tree for water and nutrients. Refresh the mulch layer each spring as it breaks down.
Step 7: Fertilize (Optional, Spring Planting Only)
If planting in spring, you may apply a light application of balanced, slow-release fertilizer formulated for acid-loving woody ornamentals. Follow package directions carefully and avoid over-fertilizing, which causes weak, leggy growth and can scorch foliage. If planting in fall, skip fertilizing until the following spring. The tree needs to focus on root establishment, not new shoot growth, during its first fall.
Watering Your Newly Planted Bloodgood
Water management in the first year is critical. During the first 4 to 6 weeks after planting, keep the soil consistently moist but not waterlogged. Water deeply 2 to 3 times per week, checking the soil at the root ball with your fingers. If the top 3 inches feel dry, water again. As the roots expand outward, gradually reduce watering frequency. By late summer of the first year, established trees handle brief dry spells if given consistent water throughout the growing season. Bloodgood is not highly drought tolerant once established, so plan to water during extended dry periods.
Avoid overhead watering, which wets foliage and can promote disease. Use a soaker hose or drip system at the base of the tree instead. In fall and winter, reduce watering unless it's unusually dry. Rainfall typically provides adequate moisture outside the growing season.
Common Mistakes to Avoid
Planting Too Deep: The most common error is setting the top of the root ball below the soil surface. This causes girdling roots and suffocation. The soil line on the trunk should be at or just above grade.
Poor Drainage: Planting in clay-heavy or compacted soil without amendment almost guarantees root rot within a few years. Don't skip the soil test and amendment step.
Ignoring Wind and Afternoon Sun: Bloodgood in a hot, windy spot scorches by mid-summer. Site selection now prevents the heartbreak of watching your tree fade to pale green or brown.
Over-Fertilizing: Excessive nitrogen fertilizer causes the tree to grow too fast with weak, spindly growth. Light feeding in early spring is enough.
Planting During Heat Stress: Installing a young tree during a 95°F June heat wave invites transplant shock. Wait for cooler weather or afternoon shade if you must plant in summer.
Mounding Mulch Against the Stem: Mulch piled against the tree's base traps moisture and invites bark rot and pest damage. Keep a 4 to 6 inch clearance around the stem.
What to Expect After Planting
After bloodgood maple planting instructions are followed correctly, your tree will establish gradually. In the first year, growth is modest as the root system expands. You may see only 6 to 12 inches of new stem growth. Don't be discouraged. The tree is investing in roots, and once the root system is secure, above-ground growth accelerates.
Bloodgood has a slow to moderate growth rate of roughly 12 to 18 inches per year once established. In about 5 to 7 years, your tree will reach a landscape-usable size of 6 to 8 feet tall. Full mature size (15 to 20 feet) takes 15 to 20 or more years. The spring after planting, you'll see small reddish-purple flowers in mid-spring (April through May), though these are inconspicuous and not the main attraction. The real show comes in summer when the burgundy foliage matures and in fall when it turns crimson to bright red.
Bloodgood is a long-lived tree, often reaching 80 to 100 or more years with good care. The effort you invest in correct planting pays dividends for decades. For ongoing care and seasonal guidance, see the complete Bloodgood Japanese Maple care guide.
Quick Reference Checklist
| Task | Timing / Details |
|---|---|
| Plant in early spring or fall | March to May or late September to October |
| Check hardiness zone | Zones 5 to 8 (zone 9 with afternoon shade, not reliable) |
| Test soil pH and drainage | Ideal pH: 5.5 to 6.5; check drainage before planting |
| Amend soil with compost | 2 parts native soil to 1 part compost, 12 to 18 inches deep |
| Dig planting hole | As deep as root ball, 2 to 3 times wider |
| Position tree at proper depth | Top of root ball at or slightly above soil line |
| Apply mulch | 3 to 4 inches, 4 to 6 inches from stem |
| Water deeply after planting | 5 to 10 minutes for #1 or smaller trees |
| Water frequently first 4 to 6 weeks | Keep soil consistently moist; check at root ball 2 to 3 times per week |
| Space from structures and trees | 12 to 20 feet, depending on mature width expected |
| Choose full sun to part shade | Afternoon shade in zones 7 to 8 to prevent scorch |
| Expect first-year growth | Modest stem growth; focus on root establishment |
| Annual growth rate | 12 to 18 inches per year once established |